Free winter activities printable
Cozy Winter Coloring: Snowy Trees and Bright Outfits
Watch a cozy winter coloring demonstration and download a reconstructed outline of its two snowboarding animal friends, snowy fir trees and little houses.
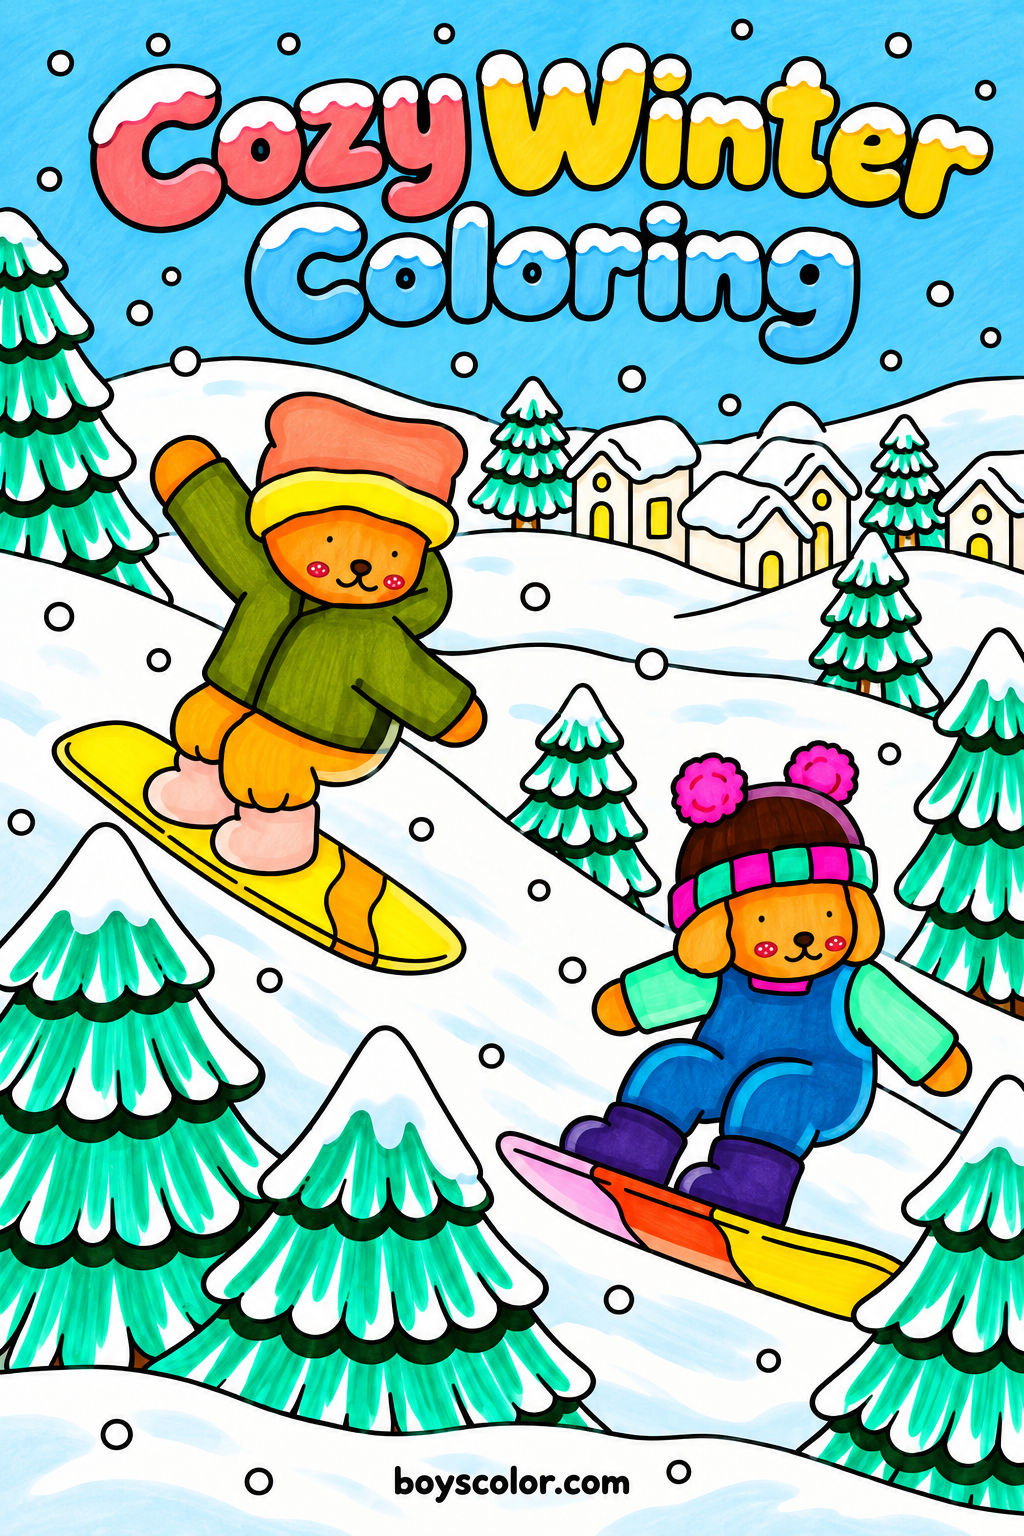
A snowy coloring scene does not need to be filled from edge to edge. White branches and a pale hillside can stay light while a green tree or a bright coat gives the picture somewhere to begin. In the creator’s winter coloring demonstration below, small animal friends wear colorful winter clothes beside snowy trees and houses. The marker work gives the trees movement without making every patch of the page the same green.
This guide turns that winter idea into a flexible coloring activity. Watch a short part, choose one tree or outfit detail to try, and stop when you have done enough for today. It works as a quiet Christmas-break or New Year holiday activity, but the video is a winter scene rather than a Santa, gifts or countdown tutorial.
The free download reconstructs the scene shown in the creator’s video: two animal friends on snowboards, broad snowy fir trees and small houses in the distance. It was rebuilt from overlapping video frames, with the color and filming background removed. The composition and poses follow the recording, although small outline details may differ; it is not the original source file. The colorful cover illustrates the same scene and is not a second worksheet.
Pick a small part of the winter scene
Set out a few coloring supplies and a scrap of paper for testing. Two greens and one bright accent are enough for a start; there is no need to own the markers in the video. Colored pencils, crayons and suitable markers can all make a winter picture. If your markers show through, protect the table with spare paper and test them before using the printable.
Download the tall 9:16 PNG below and print it in portrait orientation on Letter or A4 using Fit to page without stretching. Look at the print preview to check that both snowboarders and the tree edges are inside the margins. The winter landscape continues above and below the reconstructed video scene. This is an image file, not a pre-sized PDF. You can return to one copy across several short sessions.
Choose the part that appeals to you most: the snow-covered trees, a hat or jacket, or the open snowy ground. A child does not need to complete the whole scene or repeat the video’s colors. An adult can color alongside, describe their own choices, or simply leave the supplies within reach.
- Print one copy of the reconstructed winter snowboard scene PNG.
- Choose two greens and a favorite bright color, or use your own palette.
- Try one small idea from the demonstration rather than copying every stroke.
Watch the winter coloring demonstration
The creator’s original recording shows a winter page already outlined, with the animal friends and some clothing already colored. The visible work focuses on adding green and turquoise strokes to the fir trees, keeping pale gaps, and revisiting the branches with a darker shade. It is a coloring example, not a lesson in drawing the original outline from scratch.
Notice where the marker stops at a curved snow edge, where a pale strip remains between strokes, and how a small tree is handled differently from a large foreground tree. Pause whenever you want. The recording’s speed is not a time target, and you do not need to reproduce every stroke to try the idea on another winter page.
The free outline below follows the page in this recording, including the two snowboarding poses and snowy village setting. It is a cleaned-up reconstruction from video frames, not the original printing file, so some line details may vary. We present the website video without its original audio.
Free winter snowboard coloring page from the video
The single free PNG restores the video’s main composition in a tall 9:16 page, with added winter scenery above and below it. One animal balances with an arm raised on the upper-left slope; the floppy-ear friend crouches on a second snowboard at lower right. Broad fir trees frame the foreground, and small houses sit behind the snowy hills. The extended scenery is newly generated, not an unseen part of the original video page. This is an art activity, not an instruction for winter sports.
Keep the paper flat and start with one shape. Compare the hats, jackets and snowboard panels with the recording, or choose your own colors. The reconstructed outlines are approximate rather than pixel-identical. There are no hidden objects, numbered color keys or required answers to complete.
1. Leave room for the snow
Before coloring a tree, point to a few upper branch edges that you want to leave white. You can reserve broad pale bands rather than filling the whole tree and trying to add white afterward. The white paper itself can represent snow. It does not need to be perfectly even or outlined again with a special pen.
If it is hard to remember the pale spaces, begin with only the lowest branch section. Put a few green strokes below its top curve, then stop and look. A child can leave a larger gap than the example or color the whole section if that is what they prefer. This is a choice about the picture, not a test of accuracy.
2. Try two kinds of green marks
Use a lighter green or turquoise for the first marks. Follow the direction of the branches with short comfortable strokes, leaving a few narrow spaces between them. Add a darker green to one lower edge or one side if you want stronger contrast. Test the darker color on scrap paper first so it does not overwhelm the light one.
You do not need smooth marker blending to make this work. Separate visible strokes can be part of the look. With crayons, try a light layer followed by a few firmer marks; with pencils, keep the first layer gentle. Try the idea on one tree and color the others more simply if the page begins to feel too busy.
3. Give an outfit a bright accent
A hat brim is a useful small place to add a favorite color. Pick one bright accent and repeat it on another detail, such as a sleeve or a snowboard panel. In the video the upper-left rider has an olive jacket and warm-colored hat, while the lower-right friend wears blue overalls, green sleeves and purple boots. Follow those contrasts or choose your own.
For a shorter session, color only one hat and one tree. For a longer one, give each friend a different two-color outfit and tell why they chose it. Animal colors can be imaginary, and a partly white outfit can stay that way. Keep the simple faces readable by coloring gently around the eyes and nose.
4. Finish with one small winter story
Look at the two snowboarders and the houses beyond the hill. Where might the friends go after their outing? Perhaps they are heading home past the snowy trees or meeting someone in the village. Tell a sentence aloud or add one small drawing in the open ground. The picture does not need a long written story to feel finished.
If you want a pale snow shadow, try a light blue or gray mark on scrap first, then add only a little beneath a tree or snowboard. Leaving the whole ground white is also a complete choice. You can display the page during the holidays, give it as a small handmade winter picture, or keep it for another coloring session.
- Choose pale branch areas to leave as snow.
- Try light and dark green marks on one fir tree.
- Add a bright hat or snowboard panel color.
- Tell one sentence about the friends’ winter outing.

Download this free printable (PNG)
Ask your child: Which small color detail makes this winter scene feel most like yours?
Keep the holiday activity flexible
One colored tree is enough for a short break. If several people are coloring, let everyone choose their own palette rather than matching an adult’s example. You can repeat one idea on another winter picture later: white snow bands, two greens, or a small bright hat. Following the video is optional even when the outlines follow the same scene.
For another seasonal theme, our Christmas dinosaur activities offer different tasks with ornaments, gifts, scarf patterns and a snowy story. They are separate free pages, not additional snowboard scenes. The optional collection below is also separate from the video and reconstructed PNG.
Popular coloring collections
Hand-picked coloring page sets across our most-loved themes.