Free sharks printable
Shark and Surfboard Coloring: Try the Video's Bright Colors
Watch a blue shark and green-and-yellow surfboard coloring video, then try the color order on a free reconstructed printable with simple marker tips.
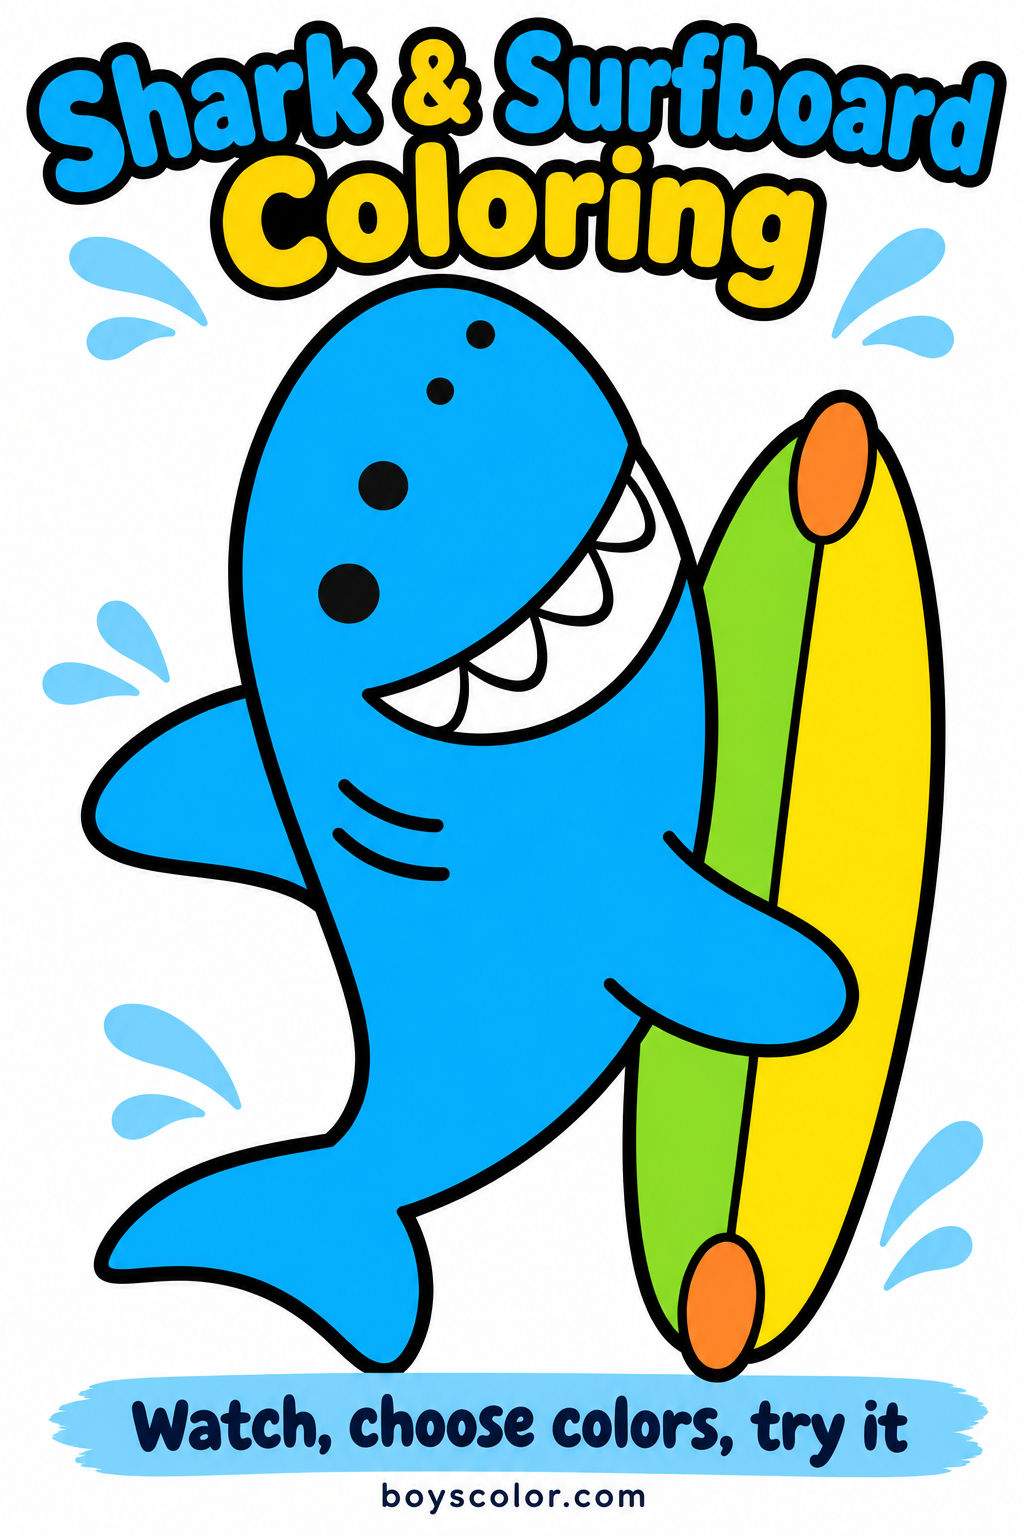
A bright blue shark, a green-and-yellow surfboard and a few bold black lines make a small coloring project with a clear place to start. In the creator's recording, the paper turns as the marker fills the shark and the two long board panels. The final dark outline makes the smile, fins and board easier to see. You can try those choices without needing to copy the speed of the video.
This guide follows that particular shark-and-surfboard drawing. It is a watch-and-try activity about filling broad shapes, keeping the teeth light and choosing a finishing outline. It is not a shark fact quiz, a drawing-from-scratch lesson or a realistic animal-color guide. Blue is simply the creator's art choice; your shark can have a different color.
The one free black-and-white PNG below reconstructs the drawing from several close-up video frames. Its rounded shark, smiling face and long divided surfboard follow the recorded composition, but small line details may differ. It is not the original source file or a promise of a pixel-identical copy. The colored cover is an illustration of this activity, not an extra worksheet.
Set out a small palette and protect the table
Print the tall 9:16 PNG in portrait orientation on Letter or A4 using Fit to page. Check the preview so the tail, fin and surfboard ends stay inside the printable margins. The download is an image, not a pre-sized PDF, so a printer may leave white space around the tall picture. Do not stretch it sideways to fill a wider sheet.
For a palette close to the recording, choose a medium blue, a bright green and a yellow, with orange for the small board details. A black drawing pen is optional. Crayons and colored pencils work too; you do not need the same marker brand, tip or paper as the creator. Test each color on scrap before touching the shark.
Place spare paper underneath if using markers. Check whether the ink shows through, and use supplies suitable for the person coloring. Keep caps together and make room to turn the sheet. The video contains close-up hand movements, not an instruction to press hard or move quickly. A small comfortable section is enough for a first attempt.
- Download and print the single shark-and-surfboard PNG.
- Test blue, green and yellow on spare paper.
- Choose whether to follow the video colors or invent your own.
Watch the shark and surfboard coloring demonstration
The creator's approximately one-minute clip shows the outlined cartoon being colored in close-up. Blue fills the shark, green and yellow divide the long surfboard, and orange marks a small board detail. Later, black lines emphasize the face, teeth, fins and the board edge. Some parts are already filled when the camera moves to them; this is an edited demonstration rather than an uninterrupted start-to-finish lesson.
Watch one short section, pause, and find that part on your printout. Notice how the artist turns the paper to reach a new edge. You may prefer a different turning direction or a smaller coloring stroke. The website copy is shown without the original audio; nothing in the activity requires sound.
Free shark and surfboard coloring page from the video
This is one complete outline page with broad open shapes and no hidden-object puzzle or numbered color key. The shark holds the board beside its body rather than riding a wave. Keep the board's long dividing line and curved ends visible as you plan the colors. The outline was rebuilt from the video, so it may have small differences around details that a hand or camera crop partly hid.
If you only want a short session, color the board first and leave the shark for later. If someone prefers the larger shape, begin with the body instead. There is no required order for finishing the picture. The following sequence simply makes the choices in the recording easy to try.
1. Fill one blue body section at a time
Point to the mouth before starting so you know which area to leave white. Begin with a comfortable patch of the shark's head or body and work toward a nearby edge. Turn the paper if a fin or the tail is awkward to reach. With a marker, try a few neighboring strokes rather than scrubbing repeatedly over the same patch.
Pause and look at the larger shape before filling another area. A few visible stroke marks do not spoil a cartoon. If you use pencils, a gentle first layer lets you decide whether to add more color. If the blue feels too dark, keep the remaining areas lighter rather than trying to erase wet marker ink.
2. Give the surfboard two clear color panels
The long line through the board makes a natural dividing point. Try green on one side and yellow on the other, as in the recording. Keep each section simple for the first pass. The two large areas already create a contrast, so the board does not need extra stripes, stars or a complicated repeating pattern.
Leave the small oval details until the main panels are finished, then add a little orange if you want to follow the example. Check the coloring tool on scrap first where two colors will meet. You can also replace the green and yellow with two favorites. These are design choices, not a rule about what a real surfboard should look like.
3. Keep the smile readable
The mouth gives the shark its friendly expression. Leaving the teeth as white paper helps them stand out against the colored head. The printable already has dark outlines, so a child can simply color around them. No extra outlining is needed to complete the activity.
If you want to try the video's bold finishing effect, let marker areas dry and test the black pen with the same colors on spare paper. Follow only one easy outside edge first. Retracing every tiny line is optional; stop if the tools smear or the pen catches the paper. An adult can demonstrate on scrap without taking over the child's picture.
4. Turn one color choice into a tiny story
Look at the board and choose a name for its color design. Is it a sunshine board, a lime board or something completely different? Ask where this imaginary shark is carrying it. One spoken sentence is enough; the scene does not need a background or a written story to be finished.
For a second session, return to an uncolored part or print the same page again and change only the board colors. Compare which version makes the blue shark easier to notice. There is no need to turn the comparison into a score, a race or a demand to reproduce the creator's result exactly.
- Color one broad shark section, keeping the mouth light.
- Choose two colors for the divided surfboard.
- Add a small accent and, optionally, a tested finishing outline.
- Name the board's color design or tell one sentence about the shark.

Download this free printable (PNG)
Ask your child: Which two colors would you choose for this shark's surfboard?
Keep the video as a starting point, not a test
A partly colored shark can wait for another day. Put the supplies away when the activity stops feeling enjoyable, and keep the unfinished sheet flat if you want to return. You can display the completed picture or keep it beside the color-test marks to remember which combination you liked.
For a different kind of shark coloring task, the related guide below offers three body-pattern pages with broad bands, spots and waves. Those are separate drawings and a separate activity. The optional Creative Fabrica collection is also different from the video and from the free reconstructed surfboard page here.
Popular coloring collections
Hand-picked coloring page sets across our most-loved themes.